The Attic Moisture Test: Simple Clues We Have a Ventilation or Bath Fan Problem
When we investigate hidden moisture, we start where the evidence collects: the attic. Worthy Construction LLC approaches attic moisture like a diagnostic exercise, because the clues are usually consistent, repeatable, and visible once we know where to look. With a few deliberate observations, we can identify whether the issue is driven by attic ventilation problems, bathroom fan venting issues, air leakage from living spaces, or a combination that keeps damp air trapped above the ceiling line.
Why the Attic Moisture Test Works
The attic is a natural “collection chamber” for warm, humid air. When that air reaches cold surfaces, it turns into condensation in attic spaces, often long before we see damage indoors. The attic moisture test is effective because it focuses on what moisture leaves behind: staining, frost patterns, damp insulation, and surface corrosion. These indicators appear in specific places depending on the source, so we can narrow the cause quickly and choose corrections that actually solve the problem.
Fast-Acting Attic Moisture Signs We Should Never Ignore
Moisture rarely announces itself with a single, obvious symptom. Instead, it shows up as clusters of small indicators that add up. The most telling attic moisture signs include:
- Frost or white crystalline buildup on nails, roof decking, or metal fasteners during colder months
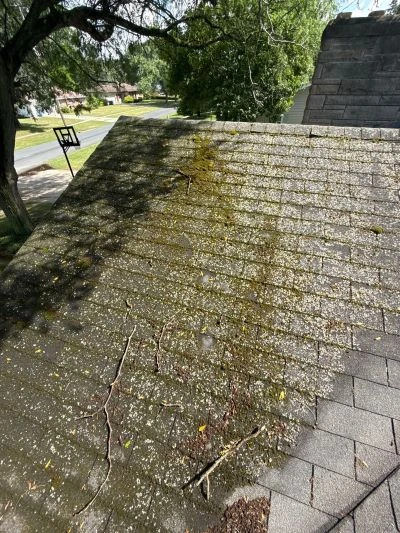
- Dark staining on roof sheathing, especially near eaves or around penetrations
- Damp, matted insulation that looks compressed or clumpy instead of fluffy
- Rust on metal components like nail plates, truss connector plates, HVAC hangers, or electrical boxes
- Musty odor that intensifies near attic access points
- Water droplets on the underside of roof decking or on plastic vapor barriers
- Mold-like discoloration in consistent lines that mirror airflow paths
These patterns matter because they tell us where air is moving, where it is getting trapped, and where it is cooling into liquid water.
Moisture Sources We Typically Confirm During the Test
Moisture in an attic usually comes from one of three sources, and the attic moisture test helps us separate them:
- Indoor humidity escaping upward through ceiling penetrations, attic hatches, recessed lights, plumbing chases, and top plates
- Improper exhaust discharge, especially from bathrooms, where fans push humid air into the attic instead of outdoors
- Roof system water entry, where liquid water penetrates at flashing, vents, chimneys, skylights, or underlayment transitions
Even when a roof leak exists, condensation can still be a parallel issue. That is why we look for the signature differences between wet-from-above and wet-from-airflow.
Performing the Attic Moisture Test Step by Step
Below is the structured process we use to read the attic like a map. Each step is designed to produce clear, actionable findings rather than vague guesses.
- We start at the access point and observe the “first air hit” zone
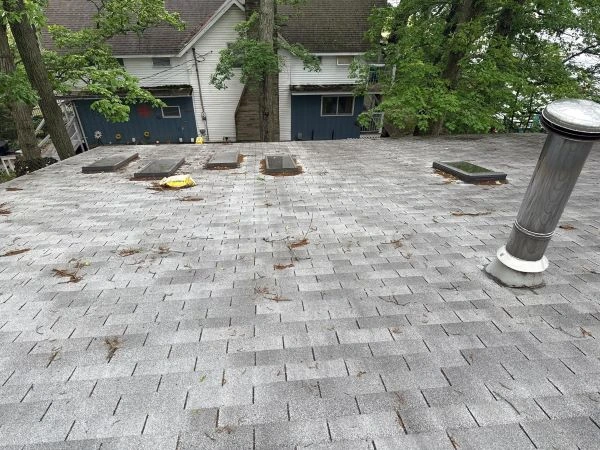
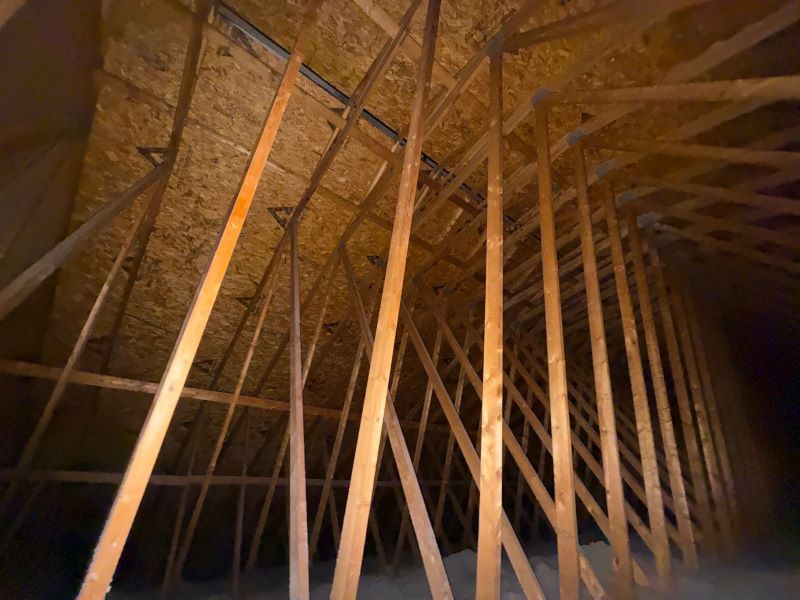
When we open the attic hatch or pull-down stair, we pause and assess odor, humidity feel, and visible staining on framing near the opening. This area often shows early evidence because warm air rises and escapes around an unsealed access. We also look for darkened wood edges, insulation gaps around the hatch curb, and dust streaking that indicates air movement. - We scan the underside of roof decking for pattern-based discoloration
We move along the attic and inspect roof sheathing for consistent bands of staining or spotty clusters. Condensation in attic spaces usually creates broad, repeating patterns, often strongest near the coldest surfaces. Roof leaks tend to produce isolated stains with gravity trails. We note whether the staining is near ridge lines, valleys, plumbing vents, or random fields of decking. - We check nails and fasteners for frost, rust, and drip points
Roofing nails that penetrate decking are excellent indicators. In cold conditions, frost on nail tips points to humid air contacting cold metal and freezing. In milder seasons, we may see rust halos or tiny water beads. These clues often show up before plywood looks wet. When nail patterns are uniform across large areas, we suspect systemic moisture rather than a single entry point. - We examine insulation condition, alignment, and moisture loading
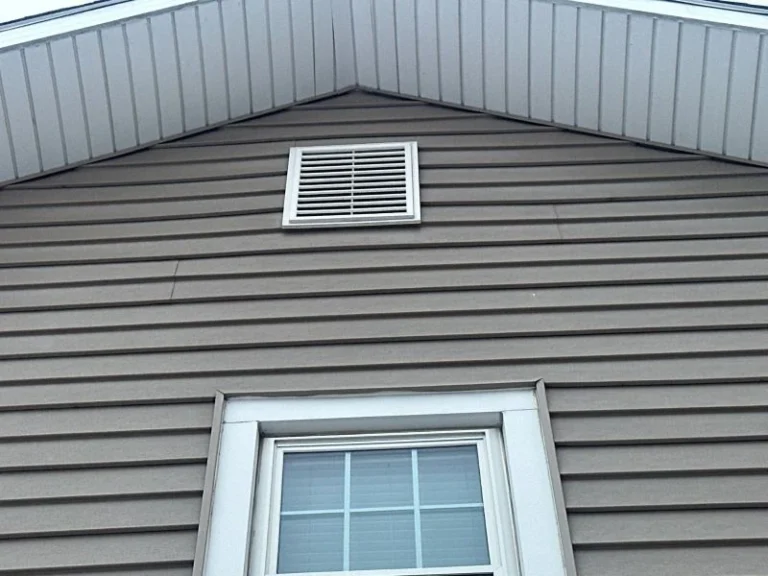
We gently review insulation for compression, discoloration, and dampness, especially over bathrooms, kitchens, and laundry zones. Wet insulation loses performance and can keep surfaces colder, worsening condensation. We also look for wind-washing at eaves, voids around penetrations, and uneven depth that signals air bypass. If insulation is damp near exhaust ducts, we prioritize fan routing and termination. - We inspect soffit, baffle, and ventilation pathways for blockage and imbalance
Ventilation only works when intake and exhaust are both clear and balanced. We confirm that soffit vents are not buried by insulation and that baffles keep an open channel from soffit to attic. Blocked intake can cause negative pressure effects and stagnant moisture pockets, classic attic ventilation problems. We also check ridge, gable, and roof vents for obstructions, damage, or poor placement. - We trace bath fan ducts from grille to termination to rule out discharge into the attic
This step is where many moisture mysteries become obvious. We follow each bathroom exhaust duct, confirm it is intact, secured, and sealed, then verify it terminates outside through a roof cap or wall cap with a functioning damper. Loose flex duct, disconnected joints, or “just venting near a gable” are common bathroom fan venting issues that dump humid air directly into the attic. - We identify air leakage routes that feed humidity into the attic
We look for open plumbing chases, unsealed electrical penetrations, attic bypasses around recessed lights, and gaps at top plates. Dust streaks on insulation and framing often mark the airflow pathways. When indoor air leaks upward, it carries moisture and heat, and that combination drives condensation on cold surfaces. Sealing these routes is frequently the missing link after ventilation upgrades.
How We Distinguish Condensation From Roof Leaks
Moisture diagnosis improves when we treat each clue as evidence:
- Condensation indicators: widespread staining, uniform nail frost, dampness that intensifies during cold snaps, and moisture near the highest points of airflow accumulation
- Roof leak indicators: localized stains near penetrations, water tracks that follow framing, wet spots after rainfall, and damage concentrated around flashing details
If moisture is present in multiple zones without a clear roof feature above them, we treat it as a ventilation and air control issue first.
Ventilation Clues That Point to Attic Ventilation Problems
Attic ventilation is a system, not a single vent. When the system is compromised, moisture lingers. Key signs include:
- Insulation packed into eaves with no baffle channel
- Soffit vents present but ineffective because air cannot travel upward
- Ridge vent installed without adequate intake, creating weak airflow
- Gable vents fighting ridge vents, short-circuiting airflow instead of sweeping the underside of the deck
- Hot, stale air pockets that remain even on cooler days
When we see these conditions alongside moisture symptoms, we prioritize restoring a continuous path: intake at soffits, free air movement through baffles, and consistent exhaust at the ridge or appropriate roof vents.
Bath Fan Venting Issues That Quietly Saturate Attics
Bathrooms produce concentrated humidity, and fans are meant to move that humidity outdoors. When they do not, moisture has one destination: the attic. We commonly find:
- Ducts disconnected or loosely attached near the fan housing
- Ducts that run too long with excessive bends, reducing airflow
- Uninsulated ducts that sweat internally in cold weather, dripping onto insulation
- Terminations that are missing dampers, allowing cold air to backflow and condense moisture inside the duct
- Venting that ends at a soffit where exhaust re-enters intake, recycling humidity
Correcting these issues often produces immediate improvement because it removes a direct moisture source rather than merely diluting it.
Air Sealing and Insulation: The Moisture Control Multipliers
Ventilation is only half of the equation. If warm indoor air is leaking into the attic nonstop, even well designed airflow can fall behind. Strategic sealing around penetrations, hatches, and top plates reduces the humidity load dramatically. Then insulation can perform consistently by keeping ceiling surfaces warmer and minimizing temperature swings that trigger recurring condensation cycles.
When we evaluate improvements, we look at the entire building envelope so the solution works as a system. As a roofing company in Kalamazoo, we often see moisture issues improve fastest when roof integrity, airflow pathways, and ceiling plane details are addressed together. For homeowners looking for roofing construction near me, this coordinated approach prevents repeat problems by aligning roof assemblies, ventilation routing, and thermal performance into one clear plan.
When Moisture Is Severe: What We Treat as High Priority
Some attic findings require faster action:
- Active dripping from decking or ducts
- Widespread mold-like growth on framing and sheathing
- Electrical components showing corrosion or moisture exposure
- Insulation saturated enough to sag or compress significantly
In these scenarios, we prioritize source control first, then drying and remediation steps appropriate to the level of contamination and material impact.
Practical Corrections That Typically Solve the Root Cause
Once we confirm the drivers, we select corrective actions that match the evidence:
- Restore balanced ventilation by clearing soffits, installing baffles, and ensuring exhaust vents function as a system
- Correct fan routing so every bathroom exhaust terminates outdoors with sealed joints and appropriate ducting
- Seal ceiling plane bypasses to reduce humidity migration into the attic
- Address any roof penetration vulnerabilities with targeted repairs rather than broad, unnecessary replacements
- Upgrade thermal performance where needed using insulation services designed to reduce cold-surface condensation risk, including properly installed attic insulation strategies that maintain ventilation channels
Where roof details are involved, we coordinate solutions through roofing services that protect flashing transitions and vent terminations without disrupting airflow design.
Frequently Asked Questions
How do we know if moisture is from condensation or a roof leak?
We compare pattern and placement. Condensation usually appears across broad areas with repeated staining, nail frost, or uniform dampness that aligns with cold surfaces and airflow routes. Leaks typically create isolated stains near a penetration or a roof feature and often show gravity trails. When moisture worsens in cold weather without recent rain, condensation becomes a stronger suspect than exterior water entry.
What attic moisture signs are the strongest indicators of a bath fan problem?
The strongest indicators cluster above bathrooms: damp insulation directly over the bathroom ceiling, staining near a flexible duct run, or visible moisture around a fan housing. If we find a duct that ends in the attic, has loose joints, or lacks an exterior termination cap, that points to bathroom fan venting issues. A musty odor concentrated near one section is another frequent clue.
Can attic ventilation problems cause mold even if the roof does not leak?
Yes. When ventilation is imbalanced or blocked, humid air remains trapped and repeatedly condenses on cold surfaces. Over time, that moisture cycle can support mold-like growth on sheathing and framing, especially where airflow deposits humidity. Attic ventilation problems are often enough to create persistent dampness without any rain intrusion. Correcting airflow pathways and reducing indoor air leakage typically stops the cycle.
Why does condensation in attic spaces show up most in winter?
Winter makes attic surfaces colder, so warm indoor air that escapes upward hits those surfaces and condenses more readily. Nails, metal plates, and roof decking become the first cold contact points. The result is frost, droplets, and staining that may not appear during mild seasons. If bathrooms are venting improperly, winter amplifies the issue because the temperature difference increases condensation potential.
What improvements usually deliver the quickest moisture reduction?
We typically see the fastest results by stopping humid air from entering the attic in the first place. That means confirming every bath fan vents outdoors, sealing duct joints, and improving the ceiling plane with targeted air sealing at penetrations and attic hatches. Next, we restore clear intake and exhaust ventilation paths. Once sources and pathways are corrected, moisture levels stabilize and materials dry naturally.
Conclusion
When we apply the attic moisture test carefully, we can pinpoint the source behind attic moisture signs, confirm whether condensation in attic spaces is driven by airflow or exhaust discharge, and resolve the underlying attic ventilation problems and bathroom fan venting issues that keep returning. For a solution built on evidence and executed with lasting craftsmanship, we rely on Worthy Construction LLC.


Trustindex verifies that the original source of the review is Google. Highest praise for all of Worthy Construction. Fantastic service, advice and attention. Full roof installation plus gutters. They kept us informed about everything happening and were done on time. Efficient, quality, professional work. Highly recommended.Trustindex verifies that the original source of the review is Google. Worthy Construction replaced our roof, gutters, and repaired our front steps. Khari was professional start to finish, from taking the time to understand what we were hoping to achieve, preparing and presenting his estimate, and all the way through to his final walk through. Great communication, quality materials and work, and great crews! I recommend Worthy Construction to anyone looking for a high quality local contractor!Trustindex verifies that the original source of the review is Google. Worthy construction Did an amazing job on my roof very fast and reliable I highly recommend his services He helped us out And I appreciate it Definitely deserve 5 stars thanks again Worthy ConstructionTrustindex verifies that the original source of the review is Google. Was a great experience, excellent customer service. Work was completed in a very timely manner. Would recommend their services to anyone.Trustindex verifies that the original source of the review is Google. Worthy Construction just replaced my roof, skylights, and gutters. I live out of town and selling my parent's house so this company came through a personal referral. Khari and team were such a joy to work with. He answered my questions, kept me updated on progress, did everything he said he was going to do, and met all of commitments on time. It's not easy to know what's happening while living out of town and I appreciate Khari's communication skills, timeliness, and overall this has been an amazing experience! I highly recommend Worth Construction!!Trustindex verifies that the original source of the review is Google. Worthy Construction did an excellent job replacing our roof. They were very easy to work with throughout the entire process. They answered all of our questions promptly and delivered a great finished product. I’d highly recommend them for your roofing needs.Trustindex verifies that the original source of the review is Google. Very professional, great guy that will work with you. Highly recommended for sure. Mr. Worthy is very dependable! He completed our roof on time and as expected!Trustindex verifies that the original source of the review is Google. Greatest service ever! Super fast and did a fantastic job. I will definitely save them to do future jobs that need to be fixed. The greatest ever!Trustindex verifies that the original source of the review is Google. My roof was very damaged, I had a huge hole in my roof from constant tree debris and age. I didn’t have any expectations going in to the project but I was greatly impressed with the speed of service! The ten we done in 2 days! They cleaned up afterwards, the materials were great quality and . The team replaced my entire rooftop. Mr. Worthy was very respectful and responsive to my concerns regarding the project, I would certainly recommend his company to anyone looking for a new rooftop!Trustindex verifies that the original source of the review is Google. He was a pleasure to work with. They were prompt and professional the whole project. He kept me informed the whole process and his work was of the highest quality. They were very respectful of my and my neighbor's properties. I am very very happy with the work they did for me.