How Roof Flashing Failures Show Up During Winter Thaws
Winter thaws are when many hidden roof issues finally reveal themselves, because melting snow and refreezing cycles push water into places it does not belong. At Worthy Construction LLC, we see this pattern every year: a roof looks “fine” through deep freezes, then a warm spell arrives and homeowners suddenly notice stains, drips, and musty odors. The culprit is often flashing, the thin, weatherproof transition material that seals roof joints and directs water back onto the shingles, not into the structure.

What Roof Flashing Really Does
Flashing is not optional trim. It is a critical waterproofing system installed anywhere the roof surface meets a break, edge, or penetration. We rely on flashing to handle the roof’s hardest jobs: sealing around chimneys, sidewalls, valleys, skylights, plumbing vents, and roof edges. When flashing is properly designed, layered, and fastened, water is directed downslope and away from seams. When flashing is misaligned, corroded, or loosely attached, winter meltwater can slip underneath and create roof flashing leaks that appear far from the original opening.
Why Winter Thaws Expose Flashing Problems
Winter thaws create a perfect stress test for a roof. Snow accumulation acts like a temporary reservoir. Once temperatures rise, meltwater flows quickly, sometimes faster than the roof can shed it. If the eaves are cold, runoff can refreeze and form ice, forcing water to back up. This is when flashing problems in winter become obvious: water is no longer just falling vertically like rain, it is moving laterally, pooling, backing up, and being driven by gravity into seams.
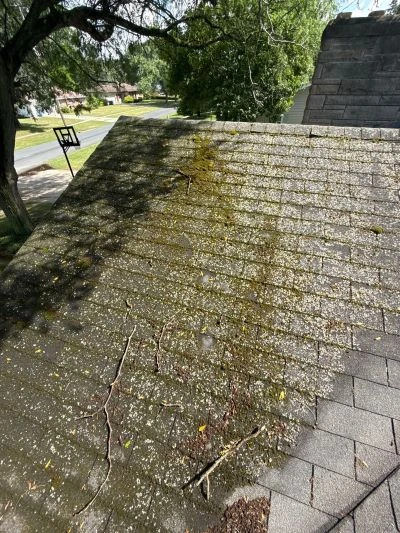
How Freeze and Thaw Cycles Damage Flashing
Repeated temperature swings cause roofing materials to expand and contract. Metal flashing shifts, sealants stiffen, and nails can gradually loosen. Even small movement matters because flashing is designed as a tight overlapping system. When overlaps separate by a few millimeters, water can travel through capillary action and seep behind shingles or into sheathing. Over time, that moisture can rot wood, corrode fasteners, and compromise insulation, turning a small weakness into a persistent interior leak during warm spells.
Most Common Roof Flashing Failure Points During Winter Thaws
Chimneys and Masonry Transitions
Chimneys are a top source of winter leaks because they combine multiple vulnerability factors: wide surface area, masonry joints that absorb moisture, and complex flashing geometry. Step flashing and counterflashing must be layered correctly and embedded properly into the chimney structure. If mortar joints crack, counterflashing can loosen and create a pathway that triggers a classic chimney flashing leak once snow melts and water runs down the chimney face.
Valleys Where Water Concentrates
Roof valleys collect runoff from multiple slopes, so winter meltwater intensity is higher there than almost anywhere else. If valley flashing is punctured by nails in the wrong locations, covered by poorly cut shingles, or clogged with debris and ice granules, water can back up and infiltrate the roof deck. Thaws accelerate valley flow, so a marginal valley detail can fail quickly and repeatedly until corrected.
Sidewalls, Dormers, and Step Flashing Runs
Where a roof meets a vertical wall, step flashing should be installed in a shingle-like sequence, with each piece overlapping the next. Winter movement can separate layers, and snow can pack tightly against sidewalls, increasing water contact time. During a thaw, meltwater drains down walls and can slip behind siding if the counterflashing is missing or the wall cladding traps moisture.
Skylights and Roof Penetrations
Skylights, vents, and mechanical penetrations rely on tight seals and properly integrated flashing kits. In winter, sealants can become rigid and lose adhesion. A small gap that does not leak during dry cold can leak aggressively during a thaw when meltwater ponds briefly around a curb or flows along the upper edge of a penetration.
Drip Edge and Eave Details
At the roof edge, flashing and drip edge direct water into gutters and away from fascia boards. If the drip edge is missing, installed incorrectly, or buried under underlayment in the wrong sequence, winter meltwater can wick back under shingles at the eaves. Thaws make this worse because water volume increases and can refreeze at night, pushing water upward beneath the roofing layers.
Warning Signs of Roof Flashing Failures During Winter Thaws
Below are the most revealing signs we look for when diagnosing roof flashing leaks. Each item reflects what winter meltwater does differently than normal rain.
- Fresh ceiling stains that grow after a warm day
We often see stains expand or darken during a thaw because meltwater flows in larger volumes and for longer periods than a typical rainfall. A small flashing gap can allow water to enter slowly, then saturate drywall and insulation. The stain may appear several feet from the actual entry point because water can run along rafters or the underside of sheathing before it drops. - Drips that start in the afternoon and stop at night
This pattern is a strong winter clue. When daytime temperatures rise, snow melts and water moves through compromised flashing. At night, temperatures fall and water flow slows or refreezes, so dripping stops. This on-off rhythm is common with flashing problems in winter because the roof is acting like a timed reservoir: melt during the day, freeze at night, repeat. - Musty odors or damp insulation near exterior walls
Flashing failures at sidewalls, dormers, and roof-to-wall transitions can send water into wall cavities rather than straight down into a room. During thaws, we may notice a musty smell, damp insulation, or minor moisture at baseboards, especially on upper floors. This is often overlooked because it does not always create dramatic dripping, yet it can quietly feed mold growth. - Bubbling paint or peeling drywall tape on exterior-facing ceilings
Slow moisture intrusion from flashing gaps can cause paint to blister and drywall tape seams to release. These cosmetic changes may show up before visible dripping. During a thaw, moisture can rise quickly because insulation becomes saturated and loses its ability to buffer humidity. We treat bubbling paint as a sign of ongoing water movement, not a cosmetic issue. - Water staining around chimneys, especially after snow melt
A chimney flashing leak often leaves telltale staining around the chimney chase, nearby ceiling corners, or the attic framing around the chimney opening. During a thaw, meltwater runs down the chimney face and can be forced into loose counterflashing, cracked mortar joints, or failed sealant lines. If staining repeats each winter, the flashing detail is usually the root cause. - Wet attic sheathing or frost patterns that turn to damp patches
In an attic, we may see frost on nails and sheathing during cold periods, then damp areas during warm spells. If the dampness concentrates near penetrations or roof joints, flashing is suspect. Meltwater intrusion is different from condensation because it forms localized wet trails, darkened wood, and sometimes dripping at specific framing intersections rather than a uniform film. - Granules, debris, or ice buildup trapped at flashing seams
Winter wind and freeze cycles move debris into corners and seams. When debris packs around flashing edges, it can hold water and slow drainage. During a thaw, that trapped water finds weak points. We consider debris accumulation near step flashing, valleys, and skylight curbs as a sign that water may be lingering long enough to exploit tiny gaps. - Gutter overflow or ice at the eaves paired with interior moisture
When gutters are clogged or ice forms at the edge, water may back up under shingles and overwhelm drip edge details. If interior stains coincide with heavy eave ice, we investigate the entire water pathway, including underlayment laps and edge flashing sequence. This combination is common in flashing problems in winter because drainage is restricted and water seeks alternate routes.
Why Flashing Leaks Can Appear Far from the Actual Failure
Water rarely takes a straight path once it gets under roofing layers. It can travel along underlayment, follow a nail line, or run down framing members before it becomes visible inside. That is why a leak stain in a bedroom does not always mean the failure is directly above the stain. With winter thaws, water movement is often slower and more sustained, allowing it to spread wider, saturate more materials, and show up unpredictably.
How We Prevent Roof Flashing Leaks Before Winter Thaws
Prevention is about durability, not patches. Reliable flashing performance requires correct material selection, correct overlap design, and correct integration with underlayment and shingles.
Use Properly Layered Flashing Systems
We prioritize flashing assemblies that follow the same principle as shingles: top layers overlap lower layers so water sheds naturally. Step flashing should be sequenced properly. Counterflashing should be anchored into masonry correctly. Valley details should keep fasteners out of high-flow channels. When the roof is layered like a drainage plane, winter meltwater has fewer chances to slip behind it.
Avoid Overreliance on Sealants
Sealants have a place, but they should not be the main waterproofing method. In cold climates, caulk can crack, shrink, or lose adhesion. During thaws, water can exploit tiny openings that sealant once covered. A better approach is mechanical overlap plus smart fastening, with sealant used as a secondary measure in controlled locations.
Strengthen Vulnerable Chimney Details
Because a chimney flashing leak can cause extensive interior damage, we treat chimneys as a specialized detail. Counterflashing should be integrated into the chimney structure, not just surface-attached. Step flashing should be correctly sized and layered with shingles. Masonry joints should be sound so the flashing remains secure through seasonal movement.
Improve Drainage at the Eaves
Winter thaws expose drainage bottlenecks. Keeping gutters clear, ensuring downspouts discharge properly, and confirming drip edge sequencing reduces the chance of backup. Where local conditions demand it, installing appropriate ice and water protection at eaves and vulnerable areas can help defend against water that tries to move uphill under snow and ice pressure.
What We Recommend When You Suspect Flashing Problems in Winter
When symptoms appear, fast action prevents secondary damage.
- Document patterns: note which rooms show stains, when dripping occurs, and how it correlates with temperature changes.
- Limit interior exposure: protect flooring and furniture, then reduce humidity to slow material saturation.
- Inspect the attic safely: look for wet trails and pinpoint likely entry zones near penetrations and roof joints.
- Address drainage issues: clear gutters and remove obvious debris where safe, because blocked drainage amplifies leakage.
- Schedule a targeted flashing evaluation: the goal is to locate the failing detail, not just treat the visible stain.
Windows and Exterior Walls on the Second Floor
Older windows and thinner wall assemblies upstairs can amplify discomfort. Even when the air temperature is technically acceptable, cold glass and under-insulated exterior walls create a radiant chill that makes rooms feel much colder than the thermostat suggests.
Key culprits:
- Single-pane or early-generation double-pane windows
- Worn weatherstripping around sashes
- Uninsulated wall cavities in older homes
- Poorly sealed trim around window frames
This is why a drafty second floor is often a building-envelope problem more than a heating-equipment problem.
FAQs About Roof Flashing Failures During Winter Thaws
Why do roof flashing leaks appear only when snow melts?
During deep cold, snow often sits in place and water stays frozen, so compromised flashing may not show immediate symptoms. When temperatures rise, meltwater becomes a continuous flow that can pool, back up, and move sideways under shingles. That sustained contact time exposes gaps and weak overlaps. This is why roof flashing leaks often show up during thaws even if the roof handled rainfall earlier.
Are flashing problems in winter usually caused by ice dams?
Ice dams are a frequent trigger, but they are not the only cause. They create backup pressure that forces water under shingles and into flashing seams. However, winter movement, brittle sealants, loose fasteners, and incorrect flashing overlaps can leak even without a major ice dam. When we see flashing problems in winter, we evaluate both the roof’s drainage behavior and the integrity of each flashing transition.
What are the most common signs of a chimney flashing leak?
A chimney flashing leak often presents as staining near the chimney, damp framing in the attic around the chimney opening, or moisture that worsens during thaws. Homeowners may also notice musty odors, peeling paint near upper walls, or wet insulation localized around the chimney chase. Because chimneys are complex, leaks can be intermittent and may occur only under heavy meltwater flow.
Can we just seal flashing with caulk and be done?
Caulk can stop a leak temporarily, but it rarely addresses the underlying failure if overlaps, fasteners, or flashing geometry are wrong. Cold weather accelerates sealant cracking and shrinkage. A durable repair typically involves restoring proper layering, replacing corroded or improperly installed flashing, and ensuring water is redirected onto the roofing surface. A correct flashing repair is a system fix, not a surface patch.
How urgent is it to address roof flashing leaks during winter?
It is urgent because water intrusion can quickly damage insulation, drywall, framing, and indoor air quality. Even small leaks can soak insulation and reduce energy performance, increasing heating costs and encouraging mold. Winter thaws can repeat several times in a season, compounding the damage with each melt cycle. Addressing flashing defects early limits repair scope and preserves structural materials.
Protecting Your Roof Before the Next Thaw
Winter thaws are predictable, but the damage they cause is preventable when flashing is designed and maintained as a complete water-control system. By recognizing early signs, focusing inspections on high-risk transitions, and scheduling timely roof flashing repair before repeated melt cycles, we reduce the likelihood of recurring roof flashing leaks and costly interior repairs. When you want a roof that stays dry through freeze and thaw patterns, we are ready to help with expert roofing services at Worthy Construction LLC.