The Complete Roof Replacement Process: What Homeowners Should Expect
A full roof replacement is one of the largest and most important investments you will ever make in your home. It affects your property’s value, safety, energy efficiency, and curb appeal. Yet many homeowners feel anxious because they have no idea what happens during roof replacement or how long they will live with noise, debris, and workers on their property. With a trusted contractor like Worthy Construction LLC, you can approach the project with confidence and a clear understanding of what is coming next.

Understanding The Roof Replacement Process Step By Step
Before you sign a contract or pick a shingle color, it helps to understand the roof replacement process step by step. When you know what each stage involves, you can plan for:
- Time off work or working from home
- Pet and child safety
- Protecting your vehicles, yard, and outdoor furniture
- Budgeting for any unexpected repairs
Below is a clear, homeowner friendly walkthrough of what happens during roof replacement from the first inspection to the final cleanup.
Step 1: Initial Roof Inspection And Consultation
Every professional roof replacement begins with a thorough inspection. This is not just a quick look from the driveway. A reputable roofing contractor will:
- Walk the entire roof surface
- Inspect shingles, flashing, vents, and penetrations
- Check for soft spots or sagging that may indicate rot
- Look inside the attic for water stains, mold, or light leaks
- Evaluate ventilation and insulation levels
During this visit, the contractor should also:
- Listen carefully to your concerns and goals
- Ask about past leaks or repairs
- Discuss your budget and timeline expectations
- Explain whether repair is still possible or if full replacement is the best option
You should receive a detailed written estimate, not just a single number. It should outline:
- Materials used
- Labor costs
- Any permits or dump fees
- Estimated roof replacement timeline
- Warranty details
Step 2: Choosing Roofing Materials And Design
Once you decide to move forward, the next step is selecting your new roof system. This is where aesthetics and performance come together.
Common roofing services include:
- Asphalt shingles
- Metal roofing panels
- Tile or slate (depending on structure and climate)
- Synthetic or composite shingles
Your roofing contractor should help you compare:
- Durability and expected lifespan
- Wind and impact ratings
- Color and style options to match your home
- Energy efficiency and reflective properties
- Manufacturer and workmanship warranties
You will also decide on:
- Ventilation upgrades such as ridge vents or box vents
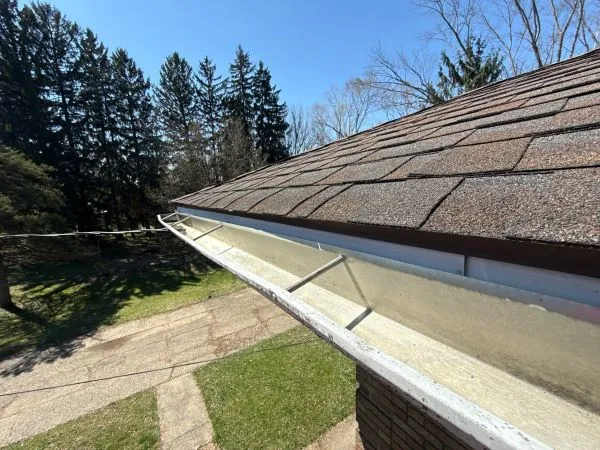
- New or upgraded gutters and downspouts
- New flashing around chimneys, skylights, and walls
- Optional ice and water shield in vulnerable areas
The choices you make here directly influence the total cost and roof replacement timeline, since some materials are more complex or time consuming to install than others.
Step 3: Scheduling And Permits
After materials and scope are finalized, the contractor will:
- Order your roofing materials
- Apply for any required permits with the local building department
- Confirm a start date based on weather conditions and crew availability
At this point, you should receive:
- A projected start and completion date
- Information about work hours
- Details about where the dumpster and materials will be placed
- Instructions for how to prepare your home, pets, and vehicles
Good communication at this stage sets the tone for the entire project. If anything affects the roof replacement timeline such as storms or material delays, a professional contractor will keep you informed.
Step 4: Preparing Your Home For Roof Replacement
A roof replacement is an active construction site on top of your home. A little preparation will protect your property and your peace of mind.
Inside your home:
- Take down fragile wall decor and anything hanging from the ceiling in upper floors
- Remove items from attic areas or cover them with plastic sheeting to protect from dust and small debris
- Close doors to rooms that do not need to be accessed during the project
Outside your home:
- Move vehicles out of the driveway and away from work areas
- Relocate patio furniture, grills, and potted plants
- Mark or protect delicate landscaping
- Unlock gates so crews can move around your property safely
Your contractor should also prepare by:
- Bringing in a dumpster for tear off debris
- Delivering shingles and materials, often on the driveway or a strong flat surface
- Setting up safety equipment such as harnesses and anchors
Step 5: Tear Off Of Old Roofing Materials
Now the visible action begins. Tear off is a critical part of the roof replacement process step by step because it exposes the condition of the roof deck underneath.
During tear off, the crew will:
- Remove old shingles or roofing panels
- Pull up nails, staples, and fasteners
- Remove old flashing, vents, and underlayment
- Carefully direct debris into the dumpster using tarps and chutes
A professional crew will protect your property by:
- Placing tarps over landscaping
- Covering windows or special features when needed
- Cleaning up loose debris throughout the day, not only at the end
Once everything is removed, the bare roof deck is exposed and ready for inspection.
Step 6: Roof Deck Inspection And Repairs
The roof deck is the structural base that supports your roofing system. If this wood is compromised, your new roof will not perform as it should.
The crew will inspect for:
- Rotten, warped, or soft wood
- Signs of mold or long term moisture problems
- Loose or squeaking sheathing panels
- Incorrect or unsafe previous repairs
Any damaged or questionable sections will be:
- Cut out and replaced with new sheathing
- Properly nailed and secured
- Prepared for underlayment installation
Sometimes this step reveals unexpected issues, which can slightly extend the roof replacement timeline and increase cost. A transparent contractor will show you photos or walk you through what they found and why repairs are necessary.
Step 7: Underlayment, Ice Barrier, And Flashing
Once the deck is solid and secure, the crew begins installing the components that protect your home from moisture.
Typical layers include:
- Synthetic or felt underlayment
- Ice and water shield in valleys, around penetrations, and along eaves where required
- New drip edge along the roof edges to guide water into the gutters
- Flashing around chimneys, skylights, and where the roof meets walls or vertical surfaces
These elements form the hidden but essential barrier that keeps water from reaching your wood structure. Proper new roof installation here is just as important as the visible shingles on top.
Step 8: Ventilation And Accessories
Before the final roofing surface goes on, the crew will address ventilation and accessories.
They may:
- Cut in ridge vent openings and install ridge vent systems
- Add or replace box vents or gable vents
- Install new plumbing boots around vent pipes
- Re-set or replace skylights as needed
- Prepare mounts for satellite dishes or other equipment, or advise moving them off the roof entirely
Correct ventilation helps:
- Maintain comfortable interior temperatures
- Reduce energy costs
- Prevent moisture buildup and attic condensation
- Extend the lifespan of your new roof and shingles
Step 9: Installing The New Roofing Material
This is the step homeowners usually picture first. Once the foundation is in place, the crew begins installing the visible roofing.
For asphalt shingles, the process usually follows this pattern:
- Starter strips installed along eaves and rakes
- First row of shingles aligned perfectly for a straight, clean edge
- Shingles installed in staggered patterns for strength and appearance
- Shingles nailed according to manufacturer specifications
- Valleys, hips, and ridges carefully detailed
- Ridge caps installed to finish and seal the top of the roof
For metal roofing or other systems, the installation steps differ but the goal is the same:
- A watertight, wind resistant, and durable final roof that meets manufacturer standards
A good contractor trains their crew to follow the manufacturer’s exact requirements. This protects your product warranty and ensures your roof performs as promised.
Step 10: Job Site Cleanup
Once installation is complete, the crew should leave your property looking cleaner than they found it.
This usually includes:
- Removing large debris and leftover materials
- Sweeping and raking around the house
- Using magnetic rollers to pick up stray nails in the yard and driveway
- Removing tarps, plastic, and protective coverings
- Hauling away the dumpster and waste
You should not have to deal with piles of shingle scraps, plastic, or nails after the crew leaves. A clean job site is part of a professional roof replacement process.
Step 11: Final Inspection And Walkthrough
The last step is a final inspection and, ideally, a walkthrough with you.
During the inspection, the contractor should:
- Check all flashing and penetrations
- Verify vents are open and functioning
- Confirm all ridges, valleys, and edges are secure
- Look for any defects or areas that need touch up
- Ensure gutters are not clogged with debris
In a homeowner walkthrough, you can expect to:
- Review before and after photos
- Discuss maintenance tips and expected lifespan
- Receive warranty information in writing
- Ask questions about anything you do not understand
This is also when you will handle final paperwork and payment according to the contract.
Typical Roof Replacement Timeline
Many homeowners want to know how long they will live with noise, crews, and materials around their home. While every project is unique, the roof replacement timeline usually follows a similar pattern.
For an average single family home:
- Planning and estimating
- 1 to 2 weeks, depending on how quickly you receive estimates and make decisions
- 1 to 2 weeks, depending on how quickly you receive estimates and make decisions
- Scheduling and material ordering
- 1 to 3 weeks, influenced by material availability and contractor schedule
- 1 to 3 weeks, influenced by material availability and contractor schedule
- Active construction
- 1 to 3 days for most asphalt shingle roofs
- 3 to 7 days or more for larger, complex, or specialty roofing systems
Factors that can extend the timeline:
- Bad weather such as heavy rain, high winds, or extreme heat
- Discovery of hidden damage during tear off
- Complex roof designs with multiple levels, valleys, or features
- Additional work such as sheathing replacement, gutter installation, or skylight upgrades
A reputable contractor will always prioritize quality and safety over rushing the job. Still, with a well coordinated crew, most homeowners are surprised at how quickly the visible part of the project is completed.
What Happens During Roof Replacement Day By Day
If you like to know exactly what is coming, here is a simple day by day view of what happens during roof replacement for a typical home.
Day 1:
- Crew arrival and setup
- Protecting landscaping and property
- Complete tear off of existing roof
- Initial deck repairs if needed
Day 2:
- Finish any remaining deck repairs
- Install underlayment, ice and water shield, drip edge, and flashing
- Begin installing new shingles or roofing panels
Day 3:
- Complete shingle or roofing installation
- Install ridge vents and caps
- Cleanup, magnetic nail sweep, and final inspection
For small or straightforward roofs, the entire job can sometimes be completed in one full day. For larger or more complex homes, the schedule may stretch to four or more days, but each step still follows the same roof replacement process step by step described above.
How To Prepare Yourself And Your Family
Knowing the process is helpful, but you also need to prepare for how the project will affect daily life.
Noise And Vibration
Roof replacement is loud. You will hear:
- Hammering
- Footsteps
- Power tools
- Debris hitting the dumpster
You may feel vibrations, especially in upper floors. Consider:
- Working off site if possible
- Letting neighbors know about the project
- Using white noise machines or headphones inside
Pets And Children
For safety, plan ahead:
- Keep pets in a quiet room away from noise and doors
- Supervise children closely when they are outside
- Do not let kids play in areas where debris may fall
Access And Parking
Make it easy for the crew to work efficiently:
- Keep the driveway clear for material delivery and the dumpster
- Avoid walking around the house while the crew is removing old roofing
- Ask the crew leader where it is safest to enter and exit the home
A short period of disruption leads to decades of protection, so a little planning goes a long way.
FAQs: Roof Repair vs. Roof Replacement
1. How long does a roof replacement take?
Typically, a residential roof replacement is completed within 1–3 days, though larger or more complex roofs and unfavorable weather conditions can extend the timeline.
2. Can I stay in my home during the roof replacement?
Yes, most homeowners remain in their homes. However, there will be noise, vibrations, and some outdoor activity during working hours.
3. How much does a new roof installation cost?
Costs vary depending on materials, roof size, and labor requirements. Asphalt shingles are typically more affordable, while metal or tile roofs have higher upfront costs but last longer.
4. Will my homeowner’s insurance cover a roof replacement?
If damage is caused by a covered peril such as hail, wind, or fire, insurance may cover part or all of the replacement. Routine wear and tear is generally not covered.
5. Which roofing material is the best choice for my home?
The best material depends on your budget, climate, and design preferences. Asphalt shingles are popular for affordability, while metal roofing offers durability and energy efficiency.
Key Takeaways For Homeowners
To recap the essentials:
- A well planned roof replacement protects your home for decades
- Understanding the roof replacement process step by step reduces stress and confusion
- A professional contractor will keep you informed about what happens during roof replacement at every stage
- The roof replacement timeline for most homes is only a few days of active construction
- Preparation, clear communication, and choosing the right partner make all the difference
When you are ready to replace your roof, choose a contractor who explains every phase, respects your property, and stands behind their work. That level of professionalism is what homeowners look for when trusting a company like Worthy Construction LLC to protect their home from the top down, whether you are planning roof replacement in Kalamazoo or searching for the right Kalamazoo roofing contractor.


Trustindex verifies that the original source of the review is Google. Highest praise for all of Worthy Construction. Fantastic service, advice and attention. Full roof installation plus gutters. They kept us informed about everything happening and were done on time. Efficient, quality, professional work. Highly recommended.Trustindex verifies that the original source of the review is Google. Worthy Construction replaced our roof, gutters, and repaired our front steps. Khari was professional start to finish, from taking the time to understand what we were hoping to achieve, preparing and presenting his estimate, and all the way through to his final walk through. Great communication, quality materials and work, and great crews! I recommend Worthy Construction to anyone looking for a high quality local contractor!Trustindex verifies that the original source of the review is Google. Worthy construction Did an amazing job on my roof very fast and reliable I highly recommend his services He helped us out And I appreciate it Definitely deserve 5 stars thanks again Worthy ConstructionTrustindex verifies that the original source of the review is Google. Was a great experience, excellent customer service. Work was completed in a very timely manner. Would recommend their services to anyone.Trustindex verifies that the original source of the review is Google. Worthy Construction just replaced my roof, skylights, and gutters. I live out of town and selling my parent's house so this company came through a personal referral. Khari and team were such a joy to work with. He answered my questions, kept me updated on progress, did everything he said he was going to do, and met all of commitments on time. It's not easy to know what's happening while living out of town and I appreciate Khari's communication skills, timeliness, and overall this has been an amazing experience! I highly recommend Worth Construction!!Trustindex verifies that the original source of the review is Google. Worthy Construction did an excellent job replacing our roof. They were very easy to work with throughout the entire process. They answered all of our questions promptly and delivered a great finished product. I’d highly recommend them for your roofing needs.Trustindex verifies that the original source of the review is Google. Very professional, great guy that will work with you. Highly recommended for sure. Mr. Worthy is very dependable! He completed our roof on time and as expected!Trustindex verifies that the original source of the review is Google. Greatest service ever! Super fast and did a fantastic job. I will definitely save them to do future jobs that need to be fixed. The greatest ever!Trustindex verifies that the original source of the review is Google. My roof was very damaged, I had a huge hole in my roof from constant tree debris and age. I didn’t have any expectations going in to the project but I was greatly impressed with the speed of service! The ten we done in 2 days! They cleaned up afterwards, the materials were great quality and . The team replaced my entire rooftop. Mr. Worthy was very respectful and responsive to my concerns regarding the project, I would certainly recommend his company to anyone looking for a new rooftop!Trustindex verifies that the original source of the review is Google. He was a pleasure to work with. They were prompt and professional the whole project. He kept me informed the whole process and his work was of the highest quality. They were very respectful of my and my neighbor's properties. I am very very happy with the work they did for me.